Whether you’re a homeowner or a renter, chances are you’ll eventually face the task of repairing drywall holes. Drywall, also known as wallboard or gypsum board, is a common building material used for interior walls and ceilings. While it’s durable, it’s not indestructible, and holes can form over time from accidents, picture hanging, or everyday wear and tear. Luckily, repairing drywall is a relatively simple DIY project that anyone can tackle with the right tools and guidance.
For tiny nail holes, a quick fix is to simply fill the hole with a small amount of spackling compound or joint compound, available at any hardware store. Using a putty knife, gently apply the compound to the hole, taking care to feather the edges to create a smooth, even surface. Allow it to dry, and then lightly sand the area until it’s flush with the wall. A light coat of primer and paint will complete the repair, making the hole disappear completely.
Larger holes, such as those caused by doorknobs or accidents, require a bit more work but are still manageable for the average person. For holes up to about 4 inches (10 cm) in diameter, a simple patch kit can be used. These kits typically include a metal patch that fits over the hole and attaches to the back of the drywall with an adhesive compound. Once the compound dries, you can apply joint compound to the patched area, let it dry, and sand it smooth before priming and painting.
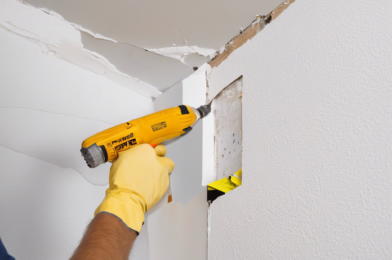
For holes larger than 4 inches (10 cm), creating a more substantial patch is necessary. This involves cutting out a section of the drywall around the hole to create a neat, rectangular, or square opening. A new piece of drywall is then cut to fit the opening, and it is screwed into place using drywall screws. Tape the seams of the new patch with drywall tape, and apply a thin coat of joint compound over the tape and screws, letting it dry before sanding. Another coat of compound may be needed, followed by priming and painting to match the surrounding wall.
It’s important to have the right tools on hand before beginning your repair, including a putty knife, sandpaper, a utility knife, a screwdriver, and a roller or brush for painting. For larger patches, a drywall saw or a rotary cutting tool may be needed to cut out the damaged area. With the right tools and some patience, fixing drywall holes can be a satisfying project that leaves your walls looking brand new.
When working with drywall, safety should always come first. Be sure to wear protective eyewear and a dust mask to avoid inhaling dust or debris. It’s also important to use caution when handling sharp tools or cutting into walls, as there may be electrical wiring or plumbing behind the drywall. If you’re ever unsure about the scope of a repair or your ability to complete it, it’s best to consult a professional contractor or handyman for assistance.
No matter the size of the hole, taking the time to properly prepare the area, apply a suitable patching compound or patch, and sand and paint the repaired area will ensure a seamless fix. With the right techniques and materials, you can easily restore your walls to their original condition, maintaining the beauty and integrity of your home. So, roll up your sleeves, grab your tools, and get ready to say goodbye to those unsightly drywall holes!
