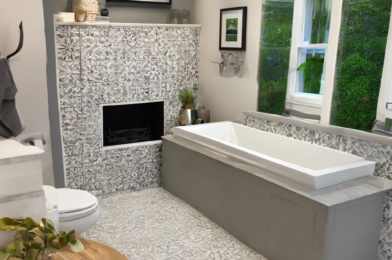
Transforming your space with a DIY tile installation can seem daunting, but with the right approach, you can achieve professional results. Whether you’re updating your kitchen backsplash, bathroom walls, or flooring, tiling is a versatile way to enhance your home’s aesthetics. This guide will walk you through the process step-by-step, making it manageable and even enjoyable. Not only will you save on labor costs, but you’ll also gain the satisfaction of a job well done.
Before you begin, gather all necessary tools and materials. You’ll need tiles, a tile cutter, adhesive, grout, spacers, a notched trowel, a level, a sponge, and safety gear like gloves and goggles. Ensure you choose tiles that suit your space and are appropriate for the area you’re tiling. For example, porcelain or ceramic tiles are excellent for wet areas like bathrooms. Having all your materials ready before starting will streamline the process and prevent any unnecessary interruptions.
Start by preparing the surface you plan to tile. Clean the area thoroughly to remove any dirt, grease, or old adhesive. If you’re tiling over an existing surface, ensure it’s smooth and even. Any imperfections can cause tiles to sit unevenly, leading to a poor finish. Use a level to check the surface, and if necessary, sand down any high spots or fill in low spots. Proper surface preparation is crucial for a durable and professional-looking tile installation.
Next, plan your tile layout. Dry-lay your tiles on the surface to see how they fit and to determine the best starting point. This step helps you visualize the final look and make any necessary adjustments before adhering the tiles. Use tile spacers to maintain consistent gaps between tiles. Planning your layout also allows you to minimize the need for cutting tiles, which can be time-consuming and challenging for beginners.
Once you’re satisfied with the layout, it’s time to apply the adhesive. Spread a thin layer of adhesive on a small section of the surface using a notched trowel. Work in small areas to prevent the adhesive from drying out before you place the tiles. Press each tile firmly into the adhesive, using spacers to maintain even gaps. As you go, periodically check that the tiles are level. Adjust as needed before the adhesive sets.
After all the tiles are in place, let the adhesive dry according to the manufacturer’s instructions. This usually takes about 24 hours. Once the adhesive is fully set, it’s time to apply the grout. Remove the spacers and mix the grout according to the package directions. Using a rubber float, spread the grout over the tiles, pressing it into the gaps. Work in small sections, and wipe away excess grout with a damp sponge before it dries on the tile surface.
Allow the grout to cure for the recommended time, usually about 24 to 48 hours. During this time, avoid getting the tiled area wet. Once the grout is fully cured, clean the tiles with a damp sponge to remove any grout haze. For added protection, apply a grout sealer, especially in areas exposed to moisture. This step will help prevent staining and keep your grout looking fresh longer.
Inspect your finished work for any imperfections. Check that all tiles are securely in place and that the grout lines are even and smooth. Touch up any areas as needed. A thorough final inspection ensures your DIY tile installation looks professional and will stand the test of time. With your new tiles in place, your space will have a fresh, updated look that you can take pride in having created yourself.
In conclusion, DIY tile installation can be a rewarding project that significantly enhances your home. By following these steps and paying attention to details, you can achieve a result that rivals professional installations. Not only will you improve your space, but you’ll also gain valuable skills and confidence for future DIY projects. So roll up your sleeves, gather your tools, and transform your space like a pro. Happy tiling!
