DIY Home Security: Affordable Ways to Protect Your Home

Keeping your home secure doesn’t have to cost a fortune. While the market for home security systems is vast and varied, there are plenty of affordable and effective options to protect your property and possessions without breaking the bank. Here are some DIY tips and tricks to fortify your home against intruders and give yourself peace of mind.

The first line of defense is often the most cost-effective and simplest to implement. Ensure all doors and windows have sturdy locks and use them consistently. Deadbolts provide added security, and for sliding doors, a simple dowel or security bar can prevent unwanted entry. Reinforce weak spots like older patio doors and consider reinforcing glass panels with security film to prevent easy smash-and-grab break-ins. Basic security lighting is a must. Motion-sensor lights are affordable and effective deterrents, and they also help guide you safely to your door at night. Place them strategically around the exterior of your home, covering potential blind spots, and consider solar-powered options to save on energy costs.

Surveillance cameras have become increasingly accessible and affordable. Modern DIY camera systems offer high-quality footage and easy-to-use apps, allowing you to monitor your home from anywhere. Place cameras in obvious spots to deter intruders and consider discrete models for areas that might be more vulnerable. Combine this with simple alarm systems, which are now easier than ever to install yourself. Basic systems start at around $100 and can provide effective protection, alerting you and potentially scaring off intruders.

Another layer of protection is to make your home look occupied at all times. Automatic timers for indoor lighting are an old trick that still works, and they’re affordable and easy to set up. For added security, use them with a few key appliances, like a radio, to really sell the illusion that someone is home. These simple yet effective measures can help improve your home security without costing a fortune. Taking a layered approach, as outlined here, provides a robust defense, and with a bit of maintenance and know-how, you can ensure your home and family are protected.

Taking a proactive approach to home security is essential, and there are a variety of creative, low-cost methods to explore. Beyond the basics of locks and lighting, consider the power of illusion to deter potential intruders. For example, installing fake security cameras or placing security system stickers on windows can create the impression of an alarmed home, even if there isn’t one. This strategy leverages the psychological concept of ‘security theater,’ where the appearance of security measures can act as a deterrent in itself. It may not provide the same level of protection as a full-fledged security system, but it can certainly make would-be intruders think twice.

Another creative tactic is the use of strategic landscaping. Careful placement of shrubs and trees can enhance the natural security of your home. Thorny or prickly bushes planted below windows can deter intruders from attempting access, while also providing an attractive feature. Similarly, taller trees and climbing plants can be used to create natural barriers and obscure potential entry points. This method not only improves security but also benefits the environment, providing habitats for wildlife and reducing your carbon footprint. A well-landscaped garden can be a beautiful and effective security measure when designed with a thoughtful approach to crime prevention through environmental design.

DIY home security is an empowering and cost-effective way to protect your family and possessions. With a combination of these strategies and a mindful approach to maintaining your home’s security, you’ll be well-equipped to deter potential intruders and create a safe and secure environment for your loved ones. Being proactive and implementing these affordable measures can give you greater peace of mind, ensuring your home is a safe haven. These simple steps are a great foundation for robust home security, and with regular reviews and maintenance, you can ensure your defenses stay reliable and up-to-date.

Fixing Drywall Holes: From Tiny Nail Holes to Large Patches

Whether you’re a homeowner or a renter, chances are you’ll eventually face the task of repairing drywall holes. Drywall, also known as wallboard or gypsum board, is a common building material used for interior walls and ceilings. While it’s durable, it’s not indestructible, and holes can form over time from accidents, picture hanging, or everyday wear and tear. Luckily, repairing drywall is a relatively simple DIY project that anyone can tackle with the right tools and guidance.

For tiny nail holes, a quick fix is to simply fill the hole with a small amount of spackling compound or joint compound, available at any hardware store. Using a putty knife, gently apply the compound to the hole, taking care to feather the edges to create a smooth, even surface. Allow it to dry, and then lightly sand the area until it’s flush with the wall. A light coat of primer and paint will complete the repair, making the hole disappear completely.

Larger holes, such as those caused by doorknobs or accidents, require a bit more work but are still manageable for the average person. For holes up to about 4 inches (10 cm) in diameter, a simple patch kit can be used. These kits typically include a metal patch that fits over the hole and attaches to the back of the drywall with an adhesive compound. Once the compound dries, you can apply joint compound to the patched area, let it dry, and sand it smooth before priming and painting.

For holes larger than 4 inches (10 cm), creating a more substantial patch is necessary. This involves cutting out a section of the drywall around the hole to create a neat, rectangular, or square opening. A new piece of drywall is then cut to fit the opening, and it is screwed into place using drywall screws. Tape the seams of the new patch with drywall tape, and apply a thin coat of joint compound over the tape and screws, letting it dry before sanding. Another coat of compound may be needed, followed by priming and painting to match the surrounding wall.

It’s important to have the right tools on hand before beginning your repair, including a putty knife, sandpaper, a utility knife, a screwdriver, and a roller or brush for painting. For larger patches, a drywall saw or a rotary cutting tool may be needed to cut out the damaged area. With the right tools and some patience, fixing drywall holes can be a satisfying project that leaves your walls looking brand new.

When working with drywall, safety should always come first. Be sure to wear protective eyewear and a dust mask to avoid inhaling dust or debris. It’s also important to use caution when handling sharp tools or cutting into walls, as there may be electrical wiring or plumbing behind the drywall. If you’re ever unsure about the scope of a repair or your ability to complete it, it’s best to consult a professional contractor or handyman for assistance.

No matter the size of the hole, taking the time to properly prepare the area, apply a suitable patching compound or patch, and sand and paint the repaired area will ensure a seamless fix. With the right techniques and materials, you can easily restore your walls to their original condition, maintaining the beauty and integrity of your home. So, roll up your sleeves, grab your tools, and get ready to say goodbye to those unsightly drywall holes!

How to Install Floating Shelves: A Step-by-Step Guide

Installing floating shelves can be a fantastic way to enhance your home’s décor and increase storage space. These shelves, which appear to “float” without visible supports, offer a sleek and modern look. Whether you’re an experienced DIYer or a beginner, this step-by-step guide will walk you through the process, ensuring your shelves are both sturdy and stylish. Floating shelves are versatile, working well in any room from kitchens and living rooms to bedrooms and bathrooms.

First, gather all the necessary materials and tools. You’ll need your floating shelves, a level, a drill, wall anchors, screws, a stud finder, a measuring tape, a pencil, and a screwdriver. Having all these items ready before you start will make the installation process smoother. Ensure that your floating shelves come with their own mounting hardware, as this will be specifically designed for the weight and structure of the shelves. Once you have everything prepared, you’re ready to start.

Begin by choosing the perfect location for your floating shelves. Consider both aesthetics and functionality when deciding where to place them. Use the stud finder to locate the wall studs, as mounting your shelves into studs will provide the most support. Mark the stud locations lightly with a pencil. If your desired location doesn’t align with the studs, you’ll need to use wall anchors to secure the shelves. Measuring and marking the height and length of where you want your shelves will ensure they’re installed evenly.

Next, hold the shelf bracket or mounting plate against the wall where you’ve marked your measurements. Use the level to make sure it’s perfectly horizontal. Mark the screw holes on the wall with a pencil. This step is crucial for ensuring your shelves will be level and stable. Double-check your marks before proceeding to avoid any mistakes. If you’re installing multiple shelves, repeat this process for each one, ensuring they’re evenly spaced and aligned.

Now, it’s time to drill the holes. Use a drill bit that matches the size of your screws or wall anchors. Carefully drill into the marks you’ve made on the wall. If you’re drilling into studs, this will be straightforward. If you’re using wall anchors, follow the instructions provided with the anchors to ensure they’re installed correctly. Insert the wall anchors into the drilled holes if needed, tapping them lightly with a hammer if they’re a snug fit. This step will ensure that your shelves can support weight without pulling out of the wall.

Attach the shelf brackets or mounting plates to the wall using the screws provided. Use your screwdriver or drill to secure the screws into the wall anchors or studs. Ensure each screw is tight, but be careful not to overtighten, as this can strip the screws or damage the wall. Once all the brackets or plates are securely attached, use your level one more time to double-check that they’re still perfectly horizontal. Adjust if necessary before proceeding to the next step.

With the brackets or plates securely in place, it’s time to mount the shelves. Slide the floating shelves onto the brackets or plates, following the manufacturer’s instructions. Some shelves may require additional screws to secure them to the brackets, while others may simply slide into place. Ensure each shelf is firmly attached and level. Give each shelf a gentle shake to check for stability. If there’s any wobbling, double-check your screws and brackets for tightness.

Once your floating shelves are securely installed, take a step back and admire your work. These shelves not only provide additional storage but also add a modern, stylish touch to any room. To complete the look, consider adding decorative items such as framed photos, plants, or books. Floating shelves can also be practical, offering space for kitchen utensils, bathroom toiletries, or office supplies. Their versatility makes them a popular choice for homeowners looking to enhance their space.

In conclusion, installing floating shelves is a straightforward DIY project that can significantly improve the look and functionality of your home. By following these step-by-step instructions, you can achieve a professional-looking result even if you’re a novice. Remember to take your time with measurements and leveling to ensure the best outcome. Enjoy the satisfaction of a job well done and the added beauty and storage your new floating shelves bring to your home. Happy installing!

Upgrade Your Kitchen on a Budget: 8 Easy DIY Ideas

Upgrading your kitchen doesn’t have to drain your wallet. With some creativity and a little elbow grease, you can achieve a stunning transformation that’s both affordable and rewarding. Here are eight easy DIY ideas to upgrade your kitchen on a budget. These tips are designed to be simple, cost-effective, and perfect for homeowners of all skill levels. From refreshing cabinets to adding new lighting, each idea will help you create a more functional and attractive kitchen without breaking the bank.

One of the easiest and most impactful changes you can make is painting your kitchen cabinets. Instead of replacing them, a fresh coat of paint can completely transform the look of your kitchen. Choose a color that complements your existing décor or go bold with a trendy hue. Prepping is key, so make sure to sand and clean the surfaces before painting. Adding new hardware, like modern handles or knobs, can further enhance the look and give your cabinets a fresh, updated feel.

Maximizing storage space in your kitchen is essential, especially if you have a smaller area. Open shelving is a stylish and practical solution. Replace some of your upper cabinets with open shelves to create an airy, spacious feel. Use these shelves to display attractive dishes, glassware, and decorative items. Additionally, consider adding pull-out shelves, lazy Susans, and drawer organizers to make the most of your existing cabinet space. These changes can make your kitchen more functional and organized.

Updating your kitchen backsplash can have a dramatic impact on the overall look of your kitchen. Peel-and-stick tiles are a budget-friendly and easy-to-install option. They come in a variety of styles, colors, and patterns, allowing you to customize your kitchen to match your personal taste. Another option is to use beadboard panels or even paint your existing backsplash. This quick update can add color, texture, and visual interest to your kitchen.

Lighting is a crucial element in any kitchen upgrade. Swapping out outdated fixtures for modern, stylish ones can instantly elevate the look of your space. Pendant lights over an island or dining area add a chic touch, while under-cabinet lighting improves both functionality and ambiance. Consider using energy-efficient LED bulbs to save on electricity costs. DIY enthusiasts can even create their own unique light fixtures using materials like mason jars or industrial pipes for a personalized touch.

Countertops play a significant role in the kitchen’s aesthetics and functionality. If replacing them isn’t within your budget, consider refinishing them. There are DIY kits available that can help you achieve the look of granite, marble, or concrete without the hefty price tag. Another option is to use countertop paint or contact paper for a quick and affordable refresh. These solutions can modernize your kitchen and give your countertops a new lease on life.

Personal touches make a kitchen feel like home. Create a gallery wall with framed prints, photos, or vintage kitchen utensils to add character and personality to your space. Incorporate plants, such as easy-to-care-for succulents or herbs, to bring a fresh, lively element to your kitchen. These small additions can make your kitchen more inviting and enjoyable to spend time in.

Decluttering and organizing your kitchen can have a huge impact on both its appearance and functionality. Clear your countertops of unnecessary items and invest in storage solutions like clear containers, labels, and tiered shelves for your pantry. A well-organized kitchen makes meal preparation easier and more efficient. Plus, a tidy space is more visually appealing, making your kitchen a pleasant place to cook and gather.

Finally, updating your kitchen accessories and textiles is a simple yet effective way to refresh your space. New dish towels, rugs, and window treatments can add pops of color and pattern without a significant investment. Look for sales or shop at discount stores to find affordable items that match your style. These small updates can tie your entire kitchen together, making it feel new and revitalized.

With these eight easy DIY ideas, upgrading your kitchen on a budget is entirely possible. Each project is designed to be cost-effective, simple to execute, and impactful. Whether you’re looking to add more storage, update your décor, or simply refresh the space, these ideas will help you achieve a kitchen you love without breaking the bank. Happy renovating!

DIY Plumbing: Fix Common Issues Without Calling a Plumber

Armed with the right tools and knowledge, you can tackle many common plumbing issues yourself, saving time, money, and the hassle of waiting for a professional. While some jobs require the expertise of a licensed plumber, there are numerous simple fixes you can perform to maintain your home’s plumbing system and avoid costly repairs down the line.

One of the most common issues homeowners face is a clogged drain. Before reaching for the chemical drain cleaners, which can damage pipes, try using a plunger. Plungers are not just for toilets; they can also be effective on sink and shower drains. For tougher clogs, a drain snake, or auger, can be your best friend. These tools are inexpensive and easy to use, and they can clear hair, grease, and other gunk that accumulates over time.

Leaky faucets are another nuisance that can be fixed without calling in the pros. The root of the problem is often a worn-out washer, which is a simple and inexpensive part to replace. All you need is a screwdriver and a new washer, and your annoying drip will be a thing of the past.

Toilet repairs can also be handled by DIY enthusiasts. If your toilet is running continuously, the culprit is often a faulty flapper valve, which is located inside the tank. Replacing this part is a straightforward task that can save gallons of water and lower your utility bills.

Additionally, knowing how to shut off your home’s main water supply is crucial in the event of a leak or burst pipe. Locate your main shut-off valve, usually found near the water meter, and familiarize yourself with how to operate it. This simple step can prevent extensive water damage in an emergency.

Remember to always turn off the water supply to the specific fixture you’re working on and never underestimate the power of prevention. Regular maintenance, such as cleaning your gutters and ensuring downspouts drain away from your home’s foundation, can prevent costly plumbing disasters.

Finally, educate yourself about your home’s plumbing system. Familiarize yourself with the location of pipes, valves, and fixtures, and keep a basic plumbing tool kit handy. With a bit of know-how and the right tools, you’ll be well-equipped to handle most common plumbing issues that come your way.

So, roll up your sleeves, grab your plunger and wrench, and get ready to tackle those plumbing problems like a pro! DIY plumbing can be a rewarding and empowering experience, and with the right approach, you’ll have those leaks and clogs under control in no time.

Painting Like a Pro: Tips for a Flawless Finish

Preparing your space and understanding your tools are key to achieving a flawless paint job. Whether you’re a seasoned pro or a novice, taking the time to set up your workspace and familiarize yourself with your equipment will result in a smoother process and a superior finish. Here are some tips to help you paint like an expert and achieve flawless results.

First and foremost, invest in quality paint and tools. Cheap paint and brushes may save you money upfront, but they can make your job harder and lead to unsatisfactory results. Spend a little extra to get good-quality paint that will cover evenly and last longer. Also, don’t skimp on brushes and rollers. Quality applicators hold more paint, ensuring a more even distribution and helping you achieve a smoother finish.

Protect your space by covering floors and furniture with drop cloths. Use painter’s tape to secure the edges and ensure a tight seal. This will not only protect your floors from paint splatters but also create a crisp, clean line where your walls meet your ceiling or trim. Take the time to do this step properly; it will make clean-up easier and give your space a polished look.

Proper preparation is key to a great finish. Start by cleaning the surfaces you’ll be painting with a mild detergent and water, and allow them to dry thoroughly. Fill any holes or cracks with spackling compound and sand them smooth once dry. Priming is also crucial, especially if you’re painting a porous surface or one that has never been painted before. A good primer will help the paint adhere better and give you a more uniform finish.

When it comes to technique, start with the edges first. Use a small brush to carefully paint around windows, doors, and moldings. Then, use a roller to paint the main surface area, working in small sections to ensure even coverage. Use long, even strokes in one direction, overlapping each stroke slightly to avoid streaks and ensure a consistent finish.

Paint in natural light to accurately judge the color and ensure a consistent finish. Start at the top and work your way down to avoid drip marks. Take breaks often to step back and assess your work, checking for any spots you may have missed or areas that need a second coat.

Good ventilation is crucial when painting, both for your health and for the drying process. Open windows to allow fresh air to circulate and, if possible, set up a fan to help speed up drying between coats.

Finally, don’t rush the process. Allow yourself plenty of time to complete the job properly, and don’t be afraid to take breaks. Painting can be tiring, and a well-rested painter is less likely to make mistakes.

10 Home Repairs You Can Do Yourself (No Experience Needed)

Home repairs can be intimidating, especially if you’ve never wielded a hammer or operated a power drill before. However, many common household fixes are surprisingly simple and don’t require professional expertise. In this article, we’ll explore ten home repairs that you can tackle yourself, even with no prior experience. These DIY projects will not only save you money but also give you a sense of accomplishment and help you become more familiar with your home’s maintenance needs. From fixing a leaky faucet to patching drywall, these repairs cover a range of household issues that homeowners frequently encounter. By learning to handle these tasks yourself, you’ll gain valuable skills and the confidence to take on more complex projects in the future. So, roll up your sleeves, gather your tools, and get ready to become your own handyman. Remember, while these repairs are beginner-friendly, always prioritize safety and don’t hesitate to call a professional if you feel uncomfortable or encounter unexpected complications.

1. Fixing a Leaky Faucet
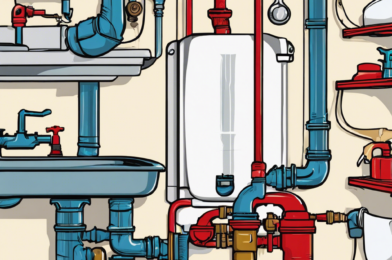
A dripping faucet is not just annoying; it can waste gallons of water and increase your utility bills. Fortunately, fixing a leaky faucet is a relatively simple task that most homeowners can handle. Start by turning off the water supply to the faucet. Then, remove the faucet handle by unscrewing it or prying off the decorative cap to access the screw underneath. Once the handle is off, you’ll see the stem assembly. The most common cause of leaks is worn-out washers or O-rings, which are easy to replace. Remove the old washer or O-ring and take it to your local hardware store to find an exact match. Replace the worn part, reassemble the faucet, and turn the water back on. If the leak persists, the issue might be with the valve seat or stem, which might require a bit more effort but is still manageable for a DIY enthusiast. Remember to keep track of the order in which you disassemble the parts to make reassembly easier. With a little patience and the right replacement parts, you can stop that annoying drip and save water in the process.

2. Unclogging a Drain
Clogged drains are a common household nuisance, but you don’t need to call a plumber every time your sink or tub is draining slowly. For minor clogs, start with a plunger. Ensure there’s enough water to cover the plunger’s head, create a tight seal around the drain, and plunge vigorously several times. If that doesn’t work, try a mixture of baking soda and vinegar. Pour about half a cup of baking soda down the drain, followed by half a cup of vinegar. Cover the drain with a plug or rag and wait 15 minutes before flushing with hot water. For more stubborn clogs, a plumber’s snake can be effective. Feed the snake into the drain until you feel resistance, then turn the handle to break up the clog. If you don’t have a snake, you can often achieve similar results with a straightened wire coat hanger. For bath and shower drains, hair is often the culprit. Remove the drain cover and use needle-nose pliers to pull out any visible hair clumps. Regular maintenance, like using a drain strainer and flushing drains with hot water weekly, can prevent future clogs. Remember, harsh chemical drain cleaners can damage your pipes, so it’s best to avoid them and stick to these gentler, more effective methods.

3. Patching Drywall
Small holes and dents in drywall are unsightly but easy to fix. For tiny nail holes, a dab of spackling compound applied with your finger is often sufficient. For slightly larger holes up to about 6 inches, you’ll need a patch. Start by cleaning the area around the hole and sanding it lightly. Cut a piece of self-adhesive mesh patch slightly larger than the hole and stick it over the damaged area. Use a putty knife to apply joint compound over the patch, feathering the edges to blend with the wall. Let it dry completely, then sand it smooth. Apply a second thin coat of compound if necessary, let it dry, and sand again until the patch is flush with the wall. For larger holes, you’ll need to cut out the damaged section in a square shape and insert a drywall patch. Secure the patch with drywall tape and joint compound, following the same process of applying, drying, and sanding until smooth. Once your patch is smooth and level with the surrounding wall, prime and paint the area to match. With practice, you’ll be able to make your walls look as good as new, erasing the evidence of past accidents or wall hangings.

4. Replacing a Toilet Flapper
If your toilet is constantly running or you hear phantom flushes, the culprit is likely a worn-out flapper. The good news is that replacing a toilet flapper is a quick and easy fix that can save you a significant amount on your water bill. Start by turning off the water supply to the toilet and flushing to empty the tank. Disconnect the chain from the flush lever and remove the old flapper. Take the old flapper to the hardware store to ensure you get an exact replacement. To install the new flapper, simply hook it onto the pegs at the base of the overflow tube and reattach the chain to the flush lever. Make sure the chain has a little slack when the flush lever is at rest. Turn the water back on and let the tank fill. Then, test the flush a few times to ensure the flapper is seating properly and creating a good seal. If you notice any leaks or if the toilet continues to run, adjust the chain length or the position of the flapper. This simple repair can typically be completed in less than 30 minutes and can significantly reduce water waste. Plus, you’ll no longer be bothered by the sound of your toilet randomly refilling throughout the day and night.

5. Fixing a Squeaky Door
A squeaky door can be incredibly annoying, but the fix is usually simple and requires no special skills. The most common cause of a squeaky door is friction in the hinges. Start by cleaning the hinges with a damp cloth to remove any built-up dirt or grime. Then, apply a lubricant to the hinge pins. You can use WD-40, silicone spray, or even cooking oil in a pinch. Spray or apply the lubricant generously, then open and close the door several times to work it into the hinge. Wipe away any excess lubricant to avoid drips. If the squeak persists, you may need to remove the hinge pins. To do this, close the door and tap out the pins from the bottom using a hammer and a nail. Clean the pins thoroughly, apply lubricant, and reinsert them. For wooden doors that are sticking rather than squeaking, the problem might be humidity causing the wood to swell. In this case, tightening the screws in the hinges or sanding down the edges of the door slightly can help. Remember to sand evenly and repaint the sanded area to protect the wood. With these simple techniques, you can silence those squeaky doors and enjoy peaceful, quiet movement throughout your home.

6. Replacing a Broken Tile
A cracked or chipped tile can be an eyesore and potentially lead to water damage if left unaddressed. Replacing a single tile is a manageable DIY project that can restore the look of your floor or wall. Begin by removing the grout around the damaged tile using a grout saw or oscillating multi-tool. Once the grout is removed, use a chisel and hammer to carefully break the tile into smaller pieces, being cautious not to damage surrounding tiles. Remove all the tile pieces and scrape off any remaining adhesive from the substrate. Clean the area thoroughly and let it dry. Apply tile adhesive to the back of the new tile using a notched trowel. Press the tile firmly into place, using tile spacers to ensure even gaps. Let the adhesive dry according to the manufacturer’s instructions. Once dry, remove the spacers and apply grout, forcing it into the gaps with a rubber float. Wipe away excess grout with a damp sponge. After the grout has set, buff away any haze with a dry cloth. This process requires patience and precision, but with care, you can achieve professional-looking results. Always wear safety glasses when breaking the old tile, and consider using knee pads if you’re working on a floor. With these steps, you can restore your tiled surface to its former glory without the expense of hiring a professional.

7. Installing a New Showerhead
Upgrading your showerhead is a simple way to improve your daily shower experience and potentially save water. Start by unscrewing the old showerhead by hand. If it’s stuck, use pliers with a cloth to protect the fixture’s finish. Once removed, clean any debris or old tape from the shower arm threads. Apply plumber’s tape to the threads, wrapping it clockwise 3-4 times. This helps create a watertight seal. Screw on the new showerhead by hand, being careful not to overtighten. If your new showerhead comes with a rubber washer, make sure it’s in place before installation. Once hand-tight, give it a quarter turn with pliers if needed, again using a cloth to protect the finish. Turn on the water to check for leaks. If you see any, tighten slightly or add more plumber’s tape. Some modern showerheads come with flow restrictors to save water. If you prefer a stronger flow, you can usually remove this restrictor following the manufacturer’s instructions. However, keep in mind that this will increase your water usage. With your new showerhead installed, you can enjoy improved water pressure, spray patterns, or even features like LED lights or Bluetooth speakers, depending on the model you choose. This simple upgrade can make your daily routine more enjoyable and efficient.

8. Fixing a Running Toilet
A running toilet can waste hundreds of gallons of water and significantly increase your water bill. The most common cause is a faulty flapper, which we covered earlier, but sometimes the issue lies with the fill valve. To diagnose the problem, remove the tank lid and flush. Watch to see if the water rises well above the overflow tube or if the fill valve never shuts off. If either of these occurs, you likely need to replace the fill valve. Start by turning off the water supply and flushing to empty the tank. Unscrew the water supply line from the fill valve. Remove the locknut under the tank that holds the fill valve in place and take out the old valve. Take it to the hardware store to find a matching replacement. Install the new fill valve by reversing the removal process. Adjust the height of the valve so the critical level mark (usually marked “CL” on the valve) is about an inch above the top of the overflow tube. Reattach the water supply line, turn the water back on, and let the tank fill. Adjust the float to stop the water about an inch below the top of the overflow tube. Flush a few times to ensure everything is working correctly. This repair can typically be completed in under an hour and can save you a significant amount on your water bill.

9. Sealing Gaps Around Windows and Doors
Drafty windows and doors can lead to higher energy bills and a less comfortable home. Fortunately, sealing these gaps is a straightforward DIY project. Start by inspecting your windows and doors on a windy day to identify where drafts are coming in. For small gaps, caulk is usually the best solution. Clean the area thoroughly and allow it to dry. Cut the tip of the caulk tube at a 45-degree angle and load it into a caulk gun. Apply the caulk in a smooth, continuous bead, filling the gap completely. Use a wet finger or caulk smoothing tool to create a neat finish. For larger gaps or spaces around door frames, foam weatherstripping is often more effective. Clean the surface and cut the weatherstripping to size. Peel off the backing and press it firmly into place, ensuring there are no gaps. For the bottom of doors, a door sweep can be installed to block drafts. These usually screw into place and have a flexible bottom that seals against the threshold. When sealing windows, be careful not to caulk them shut. Leave weep holes at the bottom of exterior windows uncovered to allow moisture to escape. By taking the time to seal gaps around your windows and doors, you can improve your home’s energy efficiency, reduce your utility bills, and create a more comfortable living environment.

10. Painting a Room
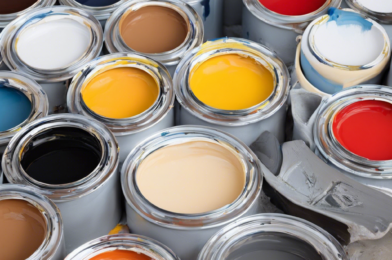
Painting is one of the most impactful and budget-friendly ways to transform a space, and it’s a project that most homeowners can tackle themselves. Start by preparing the room: remove all furniture or move it to the center and cover it with drop cloths. Remove switch plates and outlet covers, and use painter’s tape to protect trim, windows, and doors. Repair any holes or cracks in the walls with spackle, let it dry, and sand smooth. Clean the walls with a damp cloth to remove dust and let them dry completely. If you’re making a dramatic color change or painting over a dark color, apply a primer first. When you’re ready to paint, start with the edges using a brush, then use a roller for the main wall areas. Work in small sections, using a W or M pattern to distribute the paint evenly. Apply at least two coats for the best coverage, allowing each coat to dry completely before applying the next. For a professional-looking finish, remove the painter’s tape while the paint is still slightly wet to avoid peeling off any dried paint. Once everything is dry, reattach switch plates and outlet covers, and move furniture back into place. With patience and attention to detail, you can achieve a professional-looking paint job that completely refreshes your space. Remember to ventilate the room well during and after painting, and choose a low-VOC paint for a healthier indoor environment.